Pfsense firewall installation


Hello Fella’s in this section we will talk about ;
-PfSense Installation – Configuration
-After the installation part we’ll configurate pfSense according to our Workgroup enviroment
We will configurate our Pfsense as this scheme ;
Alright Lock & Load lets move on to the installation part.
Not : Please note of this fact ; If you are testing on a living system LAN section has began to distribute internal IP via DHCP to internal network.
Not2 : If you going to swap Network section IPs , my advice is ; after the installation part is done re-direct your computer on 192.168.1.0 and connect pfSense via Web Interface
1-)If you going to configurate PfSense on a VM ;
First Click on New VM>Custom Advanced and do not add an .iso file and choose ”i will install the operation System later” then choose “Other”option to complete this section.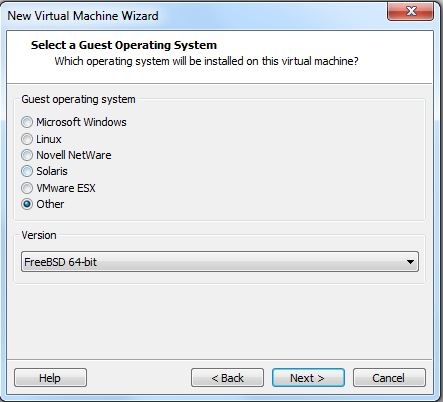
2-) Boot your system via CD and press “1 “to start installation

3-)On next screen you will see Press R(Recovery) and i (instalation) press “i” to start installation
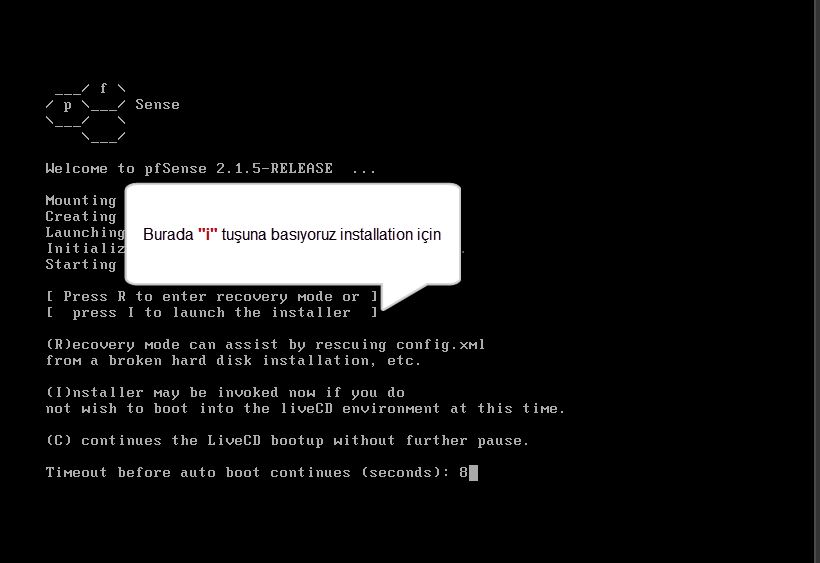
4-)Choose Accept these Settings and move on.

5-)Do not need to customize so choose Quick/Easy Installation

6-)This process will erase all contents in HDD.Press “Ok” to continue
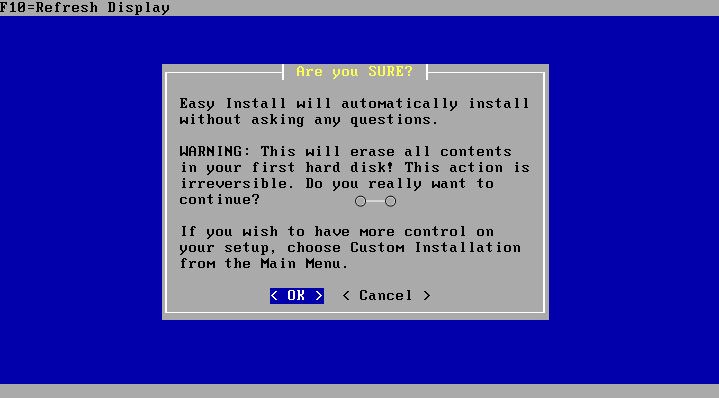
7-)Quick and Easy Installation will start
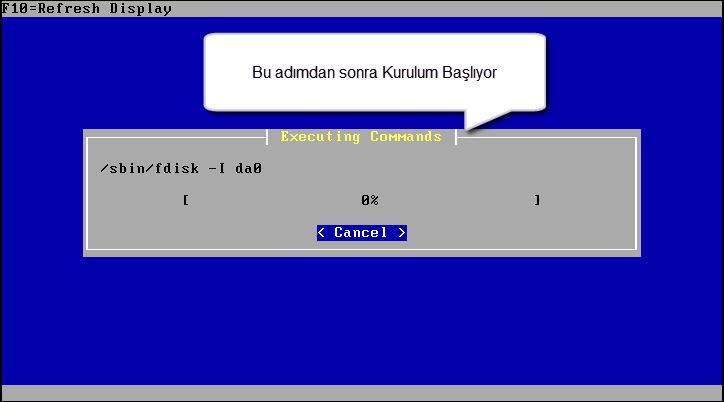
8-)You may remove CD from the CD-Drive and reboot system from the HDD
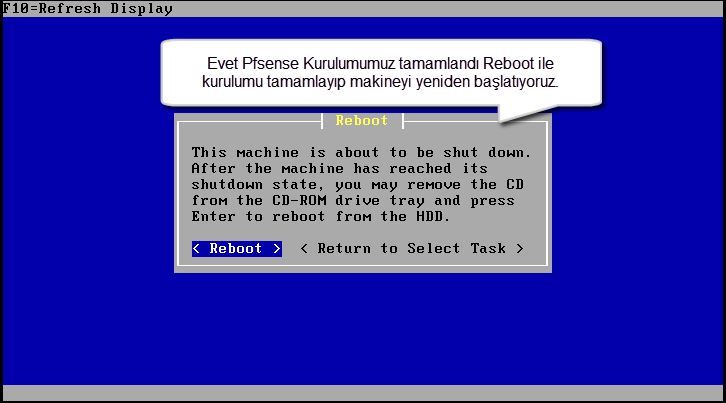
9-)Alright We’re ready to go.Now it’s time to configure PfSense in this scenario Em0 and le0 are my Ethernet card that use by the system itself.So I will set one of them as Wan Leg and other one as Lan Leg.I do not need to configure Vlan so I’m going to press “N” to skip it.

10-)In this screen enter the WAN name in this scenario as you can see i will set it as em0

11-)In this screen enter the LAN name in this scenario as you can see i will set it as le0

12-)Ok so far so good the interfaces will be assigned as em0 to WAN and le0 to LAN and press “Y” buttonto proceed.
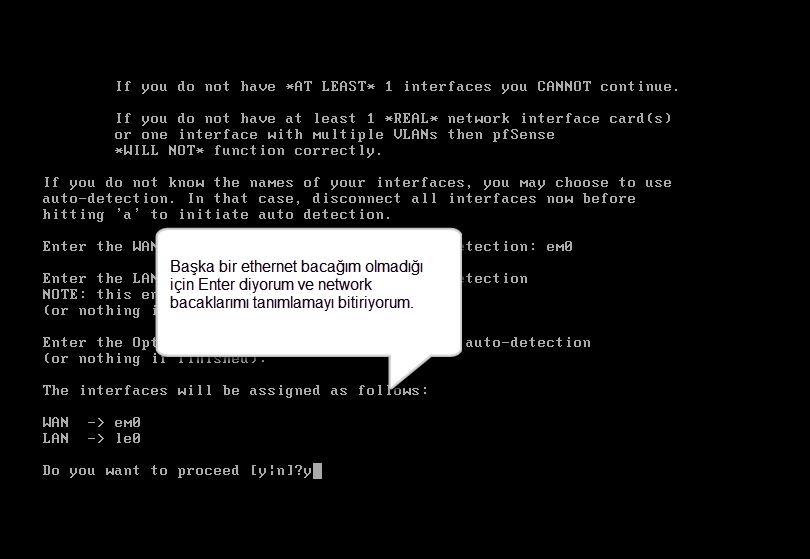
13-)As you can see PfSense configuration is done succesfully.
-pfSense is automatically assigns an IP address from the DHCP WAN leg
-By default IP address of 192.168.1.1 for the LAN leg throws as static.
-If you are testing LAN leg rope Council began distributing internal network with DHCP and if you live after the network up note of this fact.

Created By
Serdar BAYRAM


