PfSense Open VPN Configuration


Hello Fella’s ,
In this section we’ll talk about what is VPN and how to configurate VPN connection on pFSense
What is VPN?
Pronounced as separate letters and is short for Virtual Private Network Large corporations, educational institutions, and government agencies use VPN technology to enable remote users to securely connect to a private network.
There a 2 VPNs connection
Remote access(Client) VPN
A remote-access VPN allows individual users to establish secure connections with a remote computer network. Those users can access the secure resources on that network as if they were directly plugged in to the network’s servers. An example of a company that needs a remote-access VPN is a large firm with hundreds of salespeople in the field. Another name for this type of VPN is virtual private dial-up network (VPDN), acknowledging that in its earliest form, a remote-access VPN required dialing in to a server using an analog telephone system.
Noktaya VPN
Private peer-to-peer (P2P) systems are peer-to-peer (P2P) systems that allow only mutually trusted peers to participate. This can be achieved by using a central server such as a Direct Connect hub to authenticate clients. Alternatively, users can exchange passwords or cryptographic keys with friends to form a decentralized network. Private peer-to-peer systems can be divided into friend-to-friend (F2F) and group-based systems. Friend-to-friend systems only allow connections between users who know one another, but may also provide automatic anonymous forwarding. Group-based systems allow any user to connect to any other, and thus they cannot grow in size without compromising their users’ privacy. Some software, such as WASTE, can be configured to create either group-based or F2F networks.yönlendiriciler değildir.
In this section we’ll talk about VPN type that name Remote VPN(Remote Access).
In this workshop we’ll follow this diagram which is below

1-) Click on VPNàOpenVPN on next screen choose Wizards option to start installation Wizard.

In this screen we can install authentication with LDAP or Radius Server.However ; in this article we’ll use Local User Access to create Local User.

On the next step we’ll create a certificate
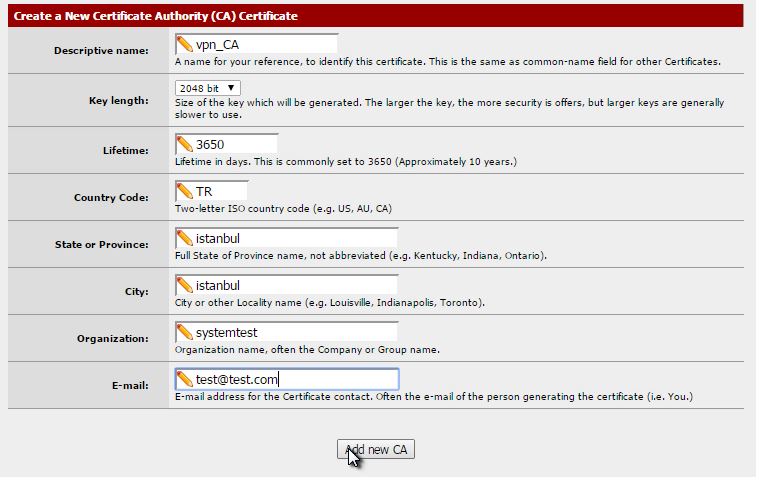
Adding certificate that created right before.
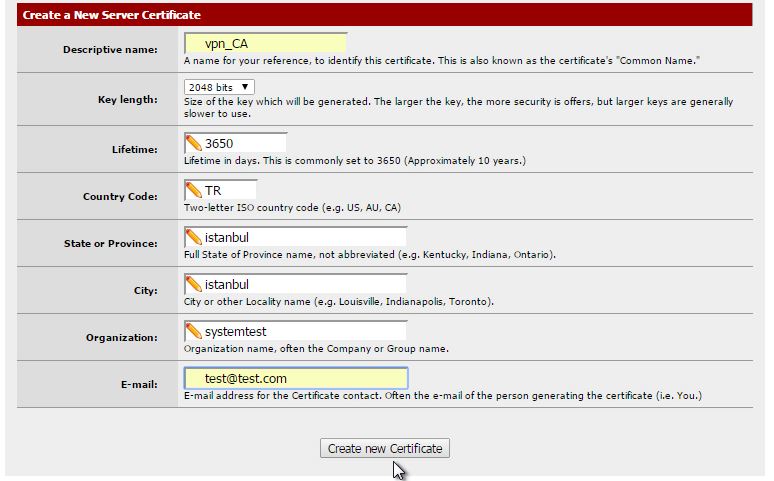
I’ll fill proper area like this.
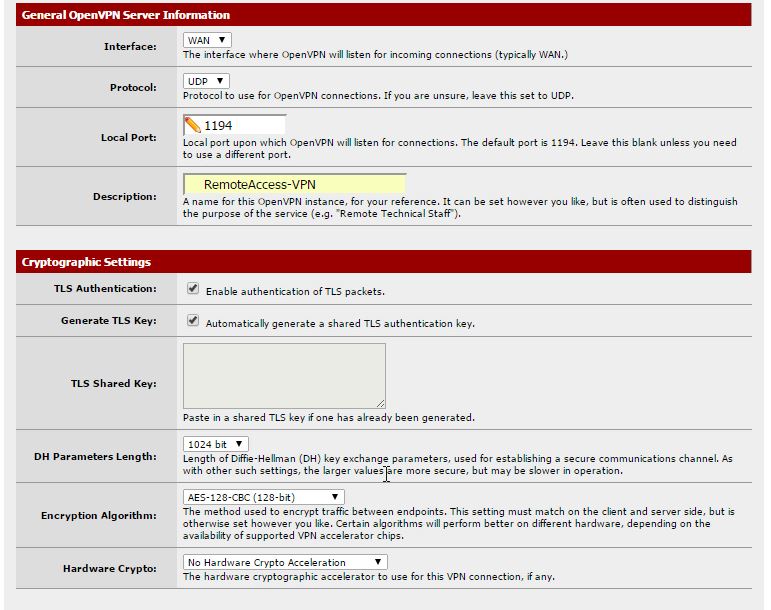

Tunnel Network: It ‘s the virtual network used for private communications between this server and clienr host expressed using CIDR.I’ve assigned to connecting clients from 10.10.10.0/24
Local Network :In this section is the network that will be accessible from the remote endpoint,expressed as a CIDR range i’ll enter inner ip that distributed from the firm’s Firewall 192.168.2.0/24

In here i’ll add DNS infos for connecting client systems.Then click on Save
In this section it asks us to create a rule or not for Firewall and OpenVPN.I’ve choose both

VPN configuration is complete.

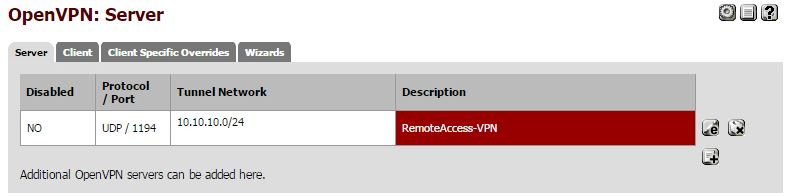
In this screen firewall–>Rule you can find the rules that you’ve created right before
2-) There is a pack that we have to install for Open VPN to do this move to SystemàPackage and start OpenVPN Client export Utilty pack installation


Installation completed.
3-) Till that we’ve done VP configuration.Now we’ll create local user that can connect to VPN
Click on SystemàUserManager click on “+” sign to add a new user.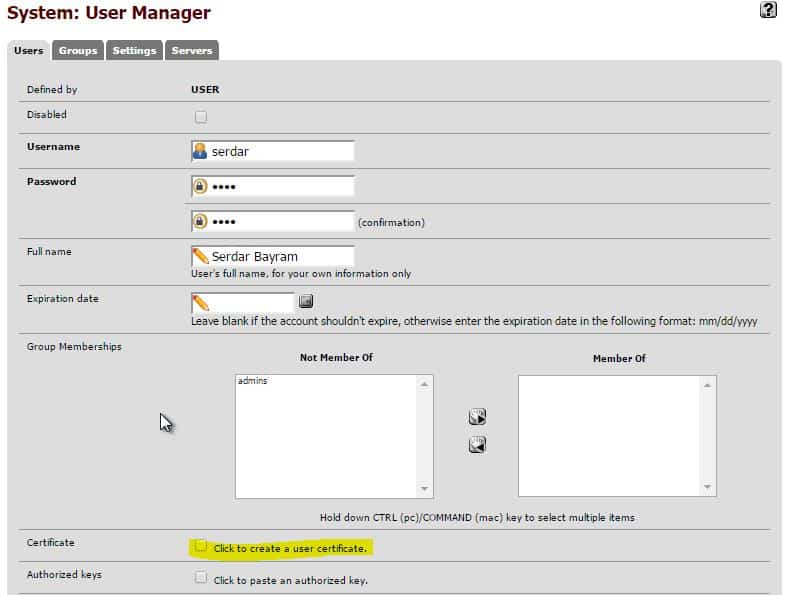
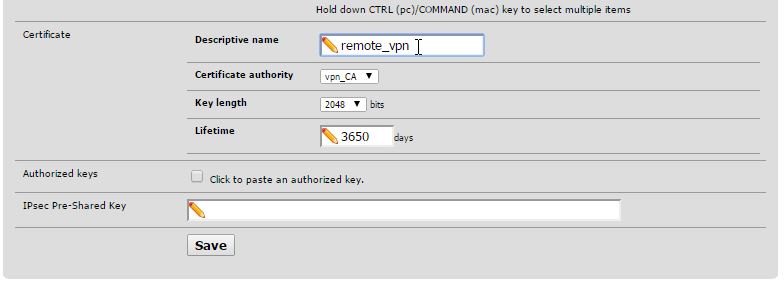
Here we’ll give a proper name and a password for users and check mark on Certificate.After chech marking on certificate give a name for it and save.
4-) I’ve configurated my VPN server.Now move to VPNàOpenVPN menü and move to bottom side of Client Export page.

In this section click on “Archive” to download proper files for open VPN.These files using on clients that connect to VPN remotely
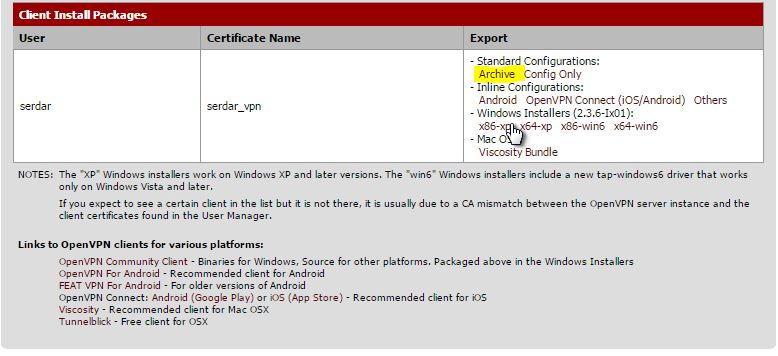
Files that i’ve downloaded right before.

5-) If your Modem not on Bridge Mode you’ll have to forward your ports.To do this forward your UDP -1194 port to Firewall’s WAN leg .I’ve forwarded my ports like below .

Processing on Client side
6-) We can connect to our VPN successfully after the proper installaions are done.
From the client side ,First ; Download and install proper version of the Open VPN from the link. https://openvpn.net/index.php/open-source/downloads.html
Copying files to C://ProgramFiles/OpenVpn/config 
Important Note :If you’re not enabling Modem’s Bridge Mode PfSense VPN added WANP leg’s ip 192.168.0.18 atuomatically.To prevent it Open Vpn Config file and add your static ip address by manually.

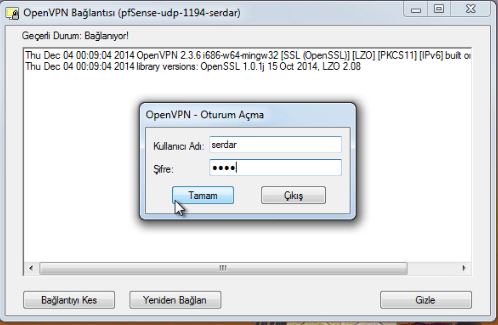
After these steps, I’ll execute OpenVpn and enter my own username / password
As you can see in this picture , vpn connection is successfully done.Client took an ip address from the 10.10.10.0/24 block.

-) To listing clients which are connect by VPN ;
Click on Statusà Open VPN menü.You can monitorize them from this screen

Serdar BAYRAM


